
Last Updated: November 4, 2026
Quick Summary
To read a peptide COA, first match the lot number on the report to your vial label, then confirm identity by comparing expected and observed mass, and finally check the HPLC purity percentage against its chromatogram and method details. A peptide COA proves identity and purity for one lot on one test date, nothing more.
- A COA should list product name, lot number, test date, and testing laboratory in its header.
- Theoretical molecular weight and observed mass should agree within the method’s stated tolerance.
- HPLC purity is the main peak’s share of total peak area and is method-dependent.
- A purity percentage with no chromatogram, method details, or integration information cannot be interpreted.
- A COA cannot prove sterility, endotoxin freedom, or that your vial came from that lot.
Table of Contents
- What a Peptide Certificate of Analysis Actually Contains
- Step 1: Match the COA to the Product Label and Vial
- Step 2: Confirm Compound Name, Sequence, CAS Number, and Molecular Weight
- Step 3: Interpret Mass Spectrometry Identity Results
- Step 4: Read HPLC Purity Results and Chromatograms
- How Peptide COA Lookup and Report Verification Work
- What Peptide COA Testing Covers and What It Cannot Prove
- What Peptide Purity Testing Cost Depends On
- Frequently Asked Questions
What a Peptide Certificate of Analysis Actually Contains
A peptide Certificate of Analysis (COA) is a lot-specific laboratory document that reports the identity, purity, and test methods used on a single batch of peptide. It is the paper trail that ties a vial in your hand to a set of analytical results. Learning how to read a peptide COA means checking that trail from top to bottom.
A COA only means something when it matches the exact vial it describes. Here is what a real report holds.
The Header: Product Name, Lot Number, and Test Date
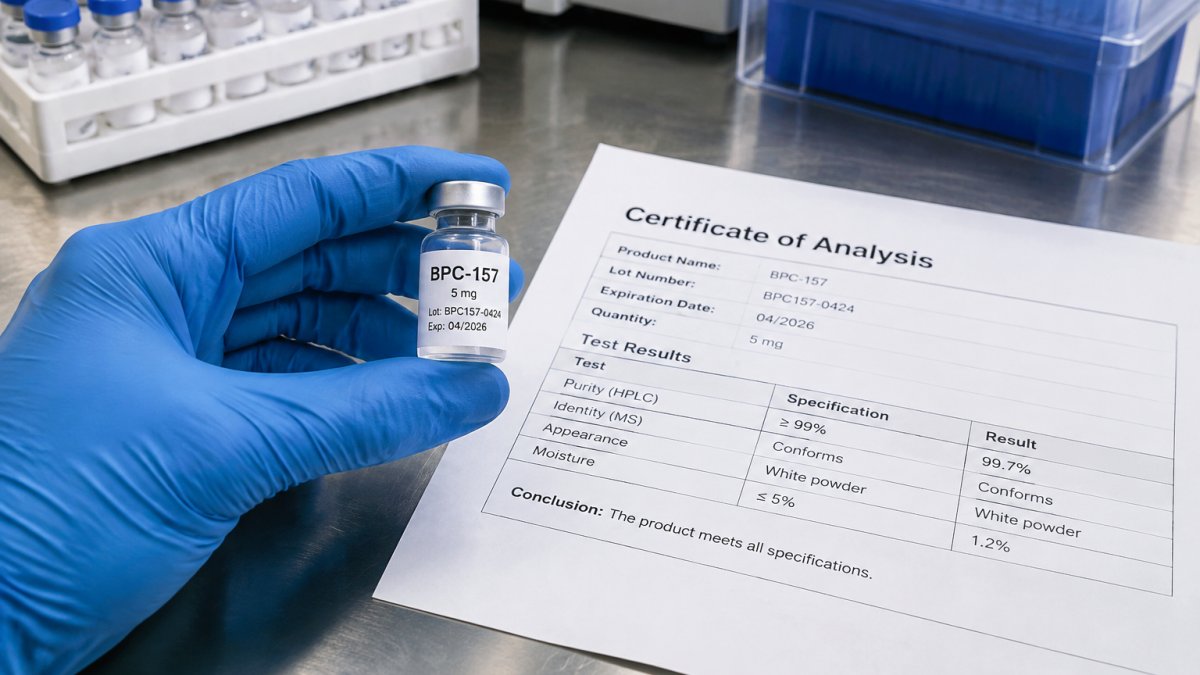
The header is where most problems start. It should list the product name, the lot number, the test date, and the testing laboratory. Compare that lot number to the label on your vial. If the two do not match, stop there and ask for the correct report.
The Body: Identity, Purity, and Method Details
The body carries the numbers you came for:
- Identity: mass spectrometry results and molecular weight
- Purity: an HPLC percentage and the chromatogram behind it
- Methods: the test method, sample identification, and test date
- Quantity and content: peptide content per vial
The next steps walk through each one in order.
Step 1: Match the COA to the Product Label and Vial
Start with the match. A peptide COA lookup is only useful if the report belongs to your vial. Check four things side by side:
- Product name on the label equals the name on the report
- Lot or batch number matches exactly
- Vial size matches the stated quantity
- Test date is recent enough for your records
A common mistake is accepting a generic sample COA. Batch-specific results are the whole point. If a supplier sends the same report for every order, the paperwork proves nothing about your vial.
For a fuller checklist of lot-matched certificate checks, see our guide on lot-matched peptide certificate checks.
Step 2: Confirm Compound Name, Sequence, CAS Number, and Molecular Weight
Identity starts with the basics. The report should state the compound name, the amino acid sequence, and the CAS number where one is assigned. Then check the molecular weight.
Theoretical molecular weight is what the sequence should weigh. Observed mass is what the lab measured. Those two numbers should agree within the method’s tolerance. A gap tells you something is off, whether that is the peptide or the test.
Watch out: some reports list a molecular weight with no sequence and no method. Without the sequence, you cannot confirm the theoretical value, and the number becomes decoration.
Step 3: Interpret Mass Spectrometry Identity Results
Mass spectrometry confirms that the peptide in the vial is the peptide on the label. The report shows an expected mass and an observed mass. When they line up, identity is confirmed for that lot.
Read it in four parts, not three:
- Expected mass: calculated from the sequence, usually stated as the monoisotopic or average mass
- Observed mass: measured by the lab, reported as the ion’s mass-to-charge ratio (m/z) and then deconvoluted to a neutral mass
- Ionization method: how the sample was ionized and read, typically ESI or MALDI
- Charge state and adducts: the ions the instrument actually detected, which explain small offsets
The number most readers misread is the observed mass. A mass spectrometer does not report a single neutral mass directly. It reports m/z values for ions carrying one or more charges, plus common adducts such as sodium or potassium. The lab then calculates the neutral mass from those ions. If the report shows only a final number with no spectrum, you cannot see whether the calculation was sound.
Small differences are normal and depend on the instrument, the calibration, and the charge state. The acceptable window is method-specific and should be stated on the report. Large differences are a red flag. If the report shows no spectrum or no method, treat identity as unconfirmed.
When you do have a spectrum, read it in this order:
- Locate the main ion cluster and note the m/z values.
- Confirm the charge states the lab assigned.
- Check whether the deconvoluted mass matches the expected mass within the stated tolerance.
- Look for unexplained peaks that suggest a different sequence, a truncation, or a modification.
Our walkthrough of peptide mass spectrometry reports goes deeper into reading the actual spectra.
Step 4: Read HPLC Purity Results and Chromatograms
HPLC purity is a percentage taken from peak area on a chromatogram. High-performance liquid chromatography separates the sample, and the main peak’s share of total peak area becomes the purity figure. That definition sounds simple, and it hides the most important limitation in the whole document.
Read the chromatogram, not just the headline number:
- Main peak: should dominate the trace and elute at the expected retention time
- Shoulder peaks: hint at related impurities or partial degradation
- Baseline: a messy baseline can inflate or deflate the result
- Method details: column, gradient, wavelength, flow rate, and run time
- Integration: how the software drew the peak boundaries, which changes the area
Here is the catch most guides skip. A purity percentage is method-dependent. Change the column, the gradient, the detection wavelength, or the integration settings, and the same sample can report a different number. A 98% result on one method is not the same claim as a 98% result on another. The percentage tells you how much of the detected material eluted as the main peak under those conditions. It does not tell you what the remaining percentage is, and it does not measure sterility, endotoxins, residual solvents, or contamination.
A purity number also carries measurement uncertainty. The lab’s own method should state a detection limit and a repeatability figure. Without those, you cannot tell whether 97.8% and 98.2% are meaningfully different or just run-to-run noise.
Watch out: a report that shows a purity percentage with no chromatogram image, no method details, and no integration information gives you a number you cannot interpret or reproduce.
What a purity result cannot prove, even when it looks clean:
- That the remaining peak area is harmless
- That the peptide is the correct sequence (that is the mass spec’s job)
- That the vial is sterile or free of endotoxins
- That the lot will still meet spec after storage
For a step-by-step method, see how to verify peptide purity.
How Peptide COA Lookup and Report Verification Work
Verification means confirming the report came from the lab that signed it. Ask for the lab’s name, contact details, and report identifier. Then check the lot number against the supplier’s records.
Some suppliers offer a COA lookup by batch number. Use it where available. A report you can trace back to a named, independent laboratory carries far more weight than a PDF with no source.
If you are confirming the batch number behind a report, our batch number verification guide covers the checks in order.
What Peptide COA Testing Covers and What It Cannot Prove
A COA proves identity and purity for one lot on one test date. That is a lot, and it is also the limit.
What it cannot prove:
- That the vial you hold came from that lot
- That the peptide is sterile or free of endotoxins
- That it is safe for any use outside laboratory research
- That it will still meet spec months later
This is where honest reading matters. A COA is evidence, not a guarantee. If a supplier implies otherwise, ask harder questions. Our candid take on whether research peptides with COA are worth the paperwork covers where the document earns its keep.
What Peptide Purity Testing Cost Depends On
Peptide purity testing cost depends on the tests run, the number of samples, and how fast you need results. Identity testing by mass spec and purity by HPLC are the baseline pair. Added tests for sterility, endotoxins, or residual solvents raise the figure.
Pricing depends on quantity, dates, and delivery. For current prices or a quote, visit the Emerald Science website.
| What You Are Checking | Where to Look | Red Flag |
|---|---|---|
| Lot match | Header vs. vial label | Same COA for every order |
| Identity | Expected vs. observed mass | No spectrum or method listed |
| Purity | Main peak vs. total peak area | Percentage with no chromatogram |
| Provenance | Lab name and report ID | No lab named anywhere |
| Limits | What the tests cover | Claims beyond identity and purity |
Frequently Asked Questions
How can you tell whether a peptide COA is authentic?
Check that the report carries a unique lot number matching your vial, a test date, the name of the testing laboratory, and the specific methods used, such as HPLC and mass spectrometry. Look for batch-specific results rather than generic specifications. Contact the supplier and ask for the raw data files or a verification path to the lab. A genuine peptide COA ties one report to one batch, and the supplier should be able to confirm that link without hesitation.
What does HPLC purity mean on a peptide COA?
HPLC purity is the percentage of the total peak area in a chromatogram attributed to the main peptide peak. A 99% figure means 99% of the UV-absorbing material eluted as that peak. It does not measure water content, counterions, or sterility. Read it alongside the chromatogram itself, checking peak shape and the size of impurity peaks, because a high percentage can still hide small but meaningful impurities.
What does mass spectrometry show on a peptide COA?
Mass spectrometry confirms identity by comparing the observed mass of the peptide to the theoretical molecular weight calculated from its amino acid sequence. When the observed mass matches the expected mass within the method’s tolerance, the compound is consistent with the stated sequence. It does not by itself confirm purity or biological activity, so pair the MS result with the HPLC data and the lot number before accepting the batch.
Where can you look up a peptide COA?
Start with the supplier’s product page or a batch lookup tool, where you enter the lot number printed on the vial label. If no lookup exists, request the report directly from the supplier and confirm it lists your specific batch. Keep the PDF filed with your research records so the report can be matched to the sample later. A supplier that cannot produce a batch-specific report on request is a red flag.
Reading a COA well is a skill, and it protects every experiment downstream. Emerald Science tests every lot independently, verifies identity by mass spec, and guarantees at least 99% HPLC purity, with a unique batch number on every product so your report always matches your vial. Reports ship as simple PDFs you can file with your research records, and orders placed before 2 PM EST go out the same day. Get started with Emerald Science and read your next COA with confidence.